On encryption and backdoors

For those people who think that it's appropriate, measured and useful for the Attorney General Senator George Brandis and Prime Minister Malcolm Turnbull to be talking about forcing tech companies and ISPs to insert backdoors into their products to enable near real-time decryption of messages, my colleagues in the IT Professionals Association (formerly SAGE-Au) have something for you to consider right now:

https://www.itpa.org.au/news/federal-government-again-gets-it-wrong-when-suggesting-it-policy-direction/

We've already had the Crypto Wars, and the insanity which was the Clipper Chip. We don't need to revisit that time. We don't need to go back to the time when encryption was decreed to be a munition, and therefore subject to export controls.

Don't think this is just about messaging (whether instant or email), either. Think about your internet banking options - not feasible to trust without strong encryption. Think about the intellectual property or your client records which your company has developed, keeps behind a firewall and requires authentication to access.

Think about your personal health records. Your tax records. The security of all these things from people who could and would do you harm is compromised when governments mandate backdoors into the security software which protects them.

What we really, desperately, need, is for government (of all stripes, and in all countries) to recognise that they cannot solve their terrrrrrrism problems by making everybody less safe.

Maths isn't the problem here.


An easy way to generate a contact sheet in MacOS

We're getting ready for J's 40th birthday, and asked a good friend who's handy with presentation software to put together a photo-based invitation for us to print. Which worked nicely until we got to the point of wanting to put four of them on the same A4 page.

My first few attempts were to convert the pptx to pdf, then import into GIMP, scale and then put four copies into one new image. This failed miserably when it came to the text - full of jaggies.

What I needed was a contact sheet.

Most of the hits you'll see in a simple search are for creating contact sheets with Adobe products such as Illustrator, Photoshop or Bridge. Since I don't have those, I tried using psnup and psbind, but couldn't figure out the right invocation. Then I went back to GIMP, and found Indexprint, but that wasn't quite right either.

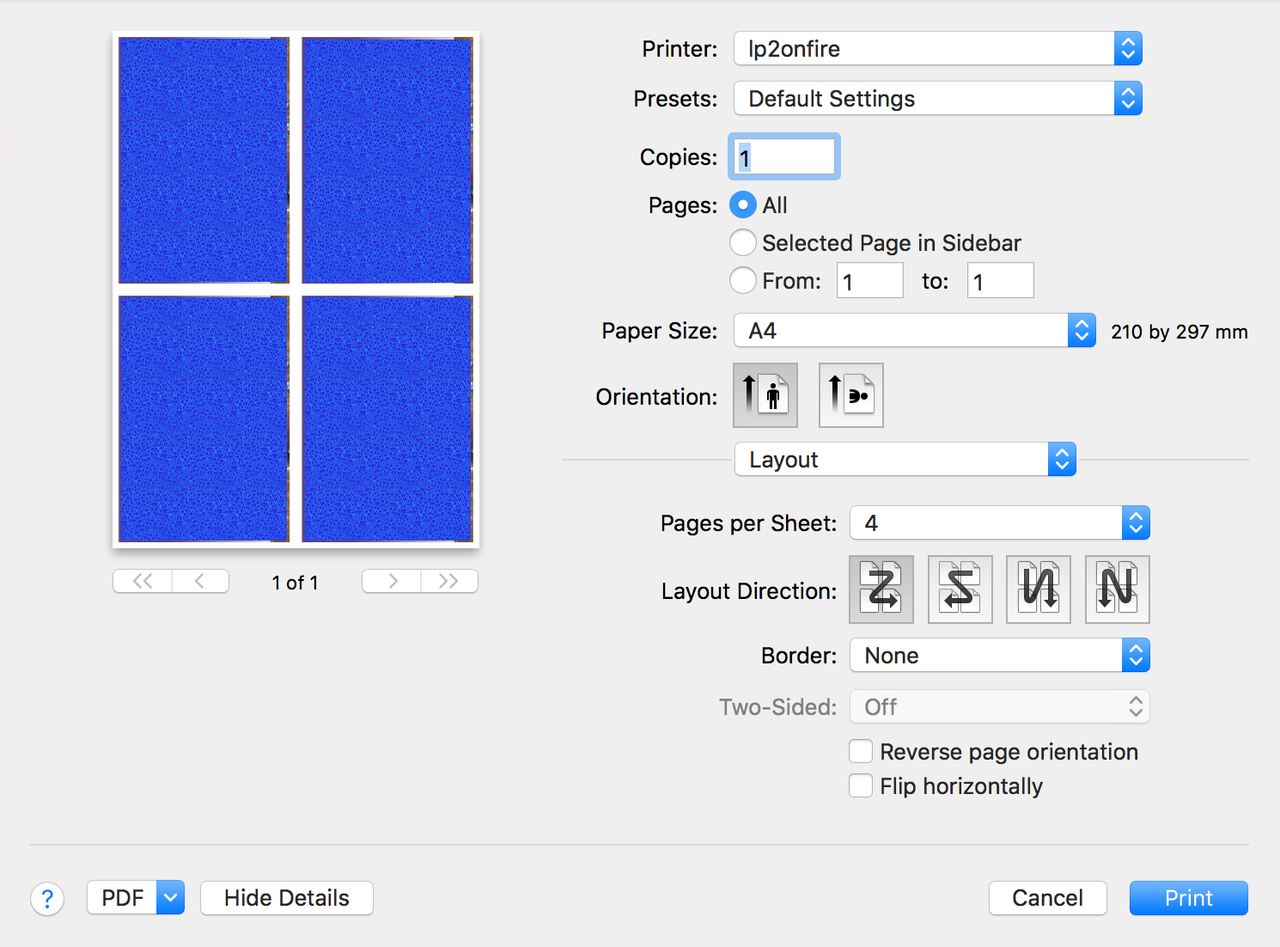
Finally, in desperation I went back in to PowerPoint, copied the slide another 3 times, and then chose Print to PDF. I had a quick look in Preview.app, and went wandering through the print dialog and noticed the Layout menu. That menu had just what I needed - 'n' pages per page!

4up preview

A few minutes later and lp2onfire has delivered a nice A4-sized photo contact sheet.


An SMF service and manifest for Smokeping

A few weeks after we got our NBN HFC1 service up and running, I set up Smokeping, which has been quite useful. What I forgot to do was create an SMF manifest and service script for it, so I missed a few days of monitoring when I updated to a newer build of Solaris.Next (or whatever that release ends up being called).

I've now fixed that oversight and thought I should share what I'd written. My installation is at /opt/smokeping/2.6.11, for the record.

Firstly, the manifest:

<?xml version="1.0"?>
<!DOCTYPE service_bundle SYSTEM "/usr/share/lib/xml/dtd/service_bundle.dtd.1">
<!--
 Copyright (c) 2017 James C. McPherson. All rights reserved.
-->

<service_bundle type='manifest' name='smokeping'>

<service
    name='network/smokeping'
    type='service'
    version='1'>

    <create_default_instance enabled='true' />

    <single_instance/>

        <dependency
                name='smokeping'
                type='service'
                grouping='require_all'
                restart_on='refresh'>
                <service_fmri value='svc:/network/http:apache24' />
        </dependency>

    <exec_method
        type='method'
        name='start'
        exec='/lib/svc/method/svc-smokeping %m'
        timeout_seconds='600' />

    <exec_method
        type='method'
        name='stop'
        exec=':kill'
        timeout_seconds='60' />

    <exec_method
        type='method'
        name='restart'
        exec=':kill'
        timeout_seconds='60' />

    <exec_method
        type='method'
        name='refresh'
        exec=':kill'
        timeout_seconds='60' />

    <template>
        <common_name>
            <loctext xml:lang='C'>
                Smokeping latency graph
            </loctext>
        </common_name>
        <description>
            <loctext xml:lang='C'>
Provides information about upstream connection latency.
            </loctext>
        </description>
    </template>

</service>

</service_bundle>

Now for the script itself:

#!/bin/sh

#
# Copyright (c) 2017, James C. McPherson. All rights reserved.
#

. /lib/svc/share/smf_include.sh

SMOKEPING=/opt/smokeping/2.6.11/bin/smokeping
PIDFILE=/var/smokeping/var/smokeping.pid


case "$1" in
'start')
        # check to see if we're still running
        if [ -f $PIDFILE ]; then
                ps -fp `cat $PIDFILE`;
                if [ $? -eq 0 ]; then
                        # still running, exit
                        exit 0
                fi
        fi
        rm -f $PIDFILE
        $SMOKEPING
        ;;

'restart')
    $SMOKEPING --restart
        ;;
'refresh')
    $SMOKEPING --reload
    ;;
'stop')
        pkill smokeping
        rm -f $PIDFILE
        ;;
'*')
        echo "what do you want to do?"
        exit 99
        ;;
esac

You can download the manifest and method script directly if desired. For use, place the manifest in /lib/svc/manifest/site and svcadm restart manifest-import. Place the script in /lib/svc/method. Enjoy!


I need a clock

In early December last year we replaced the unspeakably disgusting carpet in the loungeroom (it had been there since the house was built in the mid-80s) with some rather nice tiles. Fallout from that process involved getting rid of our Ikea Billy cd shelves, moving a bookcase from one wall to another, and EOLing (end-of-life) our Beyonwiz DPP2 pvr. We haven't recorded live tv in a ~very~ long time, so the DPP2 was a rather expensive way of providing an ntp-anchored clock.

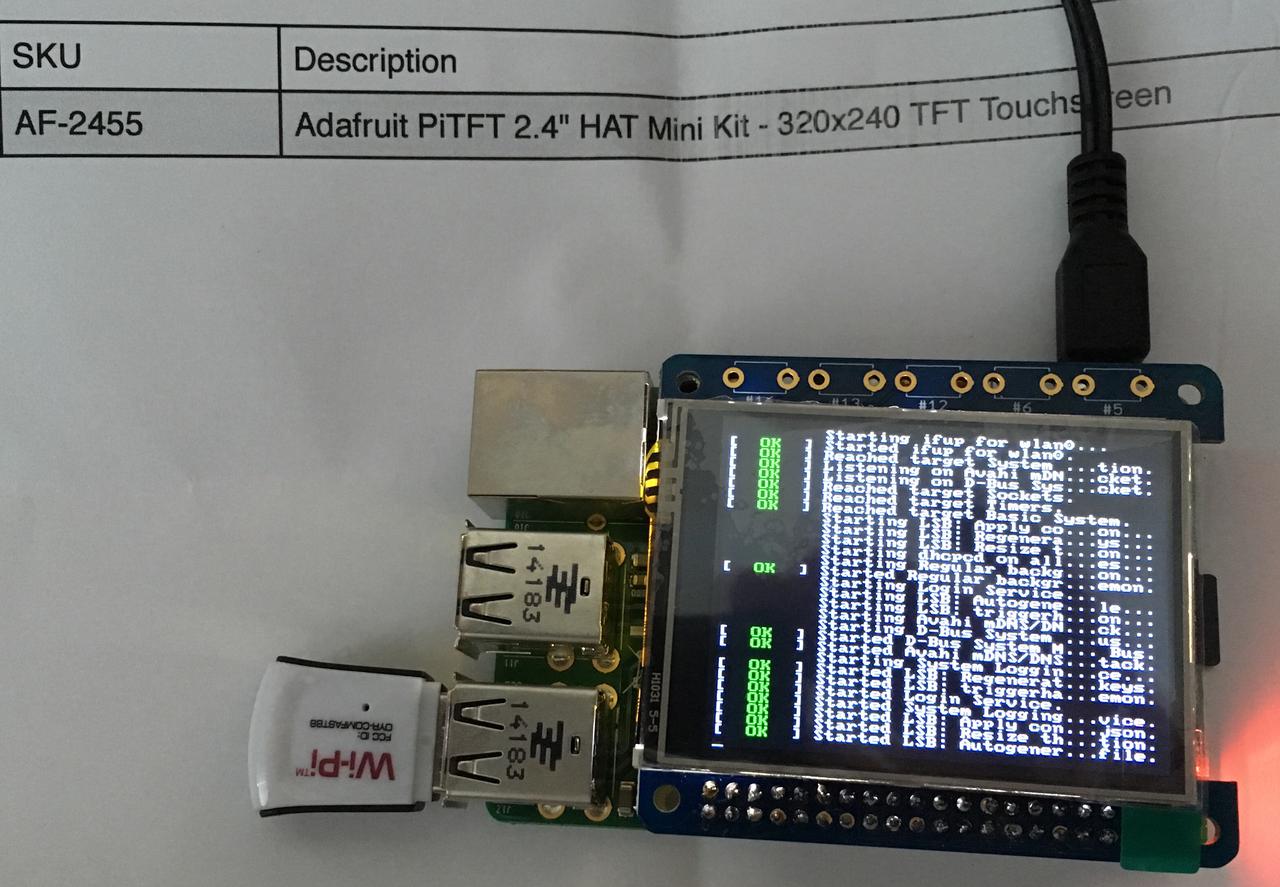
J expressed a desire for a replacement clock, and I've always appreciated having an actually accurate clock. So I acquired an Adafruit PiTFT panel. After being surprised that I had to solder the 40pin socket connector myself (not having soldered anything in more than 10 years), I managed to do it sufficiently well that the device was fine on boot and got a working display:

First boot with the PiTFT attached

Now since the Pi in the loungeroom runs OSMC, that is, it's an appliance, it doesn't have the requisite Adafruit drivers in its repo. So... time to build a fresh kernel.

I build fresh Solaris kernels several times a day, and in 2014 Tim, Mark and I delivered a major rewrite for how we actually build core Solaris. But I haven't built a linux kernel in about 20 years - I had to go looking for instructions on where to start! I've taken my lead from *khAttAm* and now I've got the repo building on the pi. It's going to take a while, though, because (a) the pi is fairly low-powered, and (b) I've set it up so that the OSMC home directory is actually mounted from our Solaris media server so we don't run out of space with the media db.

Anyway, once that kernel and its modules are built, I hope to schlep them into place, suddenly have a /dev/fb1 on which to display this:

#!/usr/bin/python3.4

# from http://stackoverflow.com/questions/7573031/when-i-use-update-with-tkinter-my-label-writes-another-line-instead-of-rewriti
# only slightly modified


import tkinter as tk
import time

class piClocknDate(tk.Tk):
    def __init__(self, *args, **kwargs):
        tk.Tk.__init__(self, *args, **kwargs)
        self.maxsize(width=320, height=240)
        self.resizable(0, 0)
        self.title("rpi Clock")
        self.fontC = "helvetica 36 bold"
        self.fontD = "helvetica 18 bold"
        self.padc = 40
        self.padd = 50
        self.clockL = tk.Label(self, text="", font=self.fontC,
                               padx=self.padc, pady=70,
                               foreground="light blue", background="black")
        self.clockL.pack()
        self.curdate = time.strftime("%d %B %Y", time.localtime())
        self.dateL = tk.Label(self, text=self.curdate, font=self.fontD,
                              padx=self.padd, pady=70,
                              foreground="blue", background="black")
        self.dateL.pack()

        # start the clock "ticking"
        self.update_clock()
        self.update_date()

    def update_clock(self):
        curt = time.localtime()
        disptime = time.strftime("%I:%M  %p" , curt)
        secs = int(time.strftime("%S"))
        padx = self.padc
        if secs % 15 is 0:
            padx = self.padc - 10
        self.clockL.configure(text=disptime, padx=padx)
        # call this function again in one second
        self.after(1000, self.update_clock)

    def update_date(self):
        newdate = time.strftime("%d %B %Y", time.localtime())
        if newdate is not self.curdate:
            self.curdate = newdate
            self.dateL.configure(text=self.curdate, padx=self.padd)
        self.after(1000, self.update_date)


if __name__== "__main__":
    app = piClocknDate()
    app.mainloop()


Turning off comments

Late last week there was some idle chatter in an internal channel about blog software. Quite a few of my colleagues run their own websites, often using a Solaris 11.3 kernel zone. I mentioned the software that I've been using (well-known) and one particular colleague was aghast.

He recommended that I investigate a static site generator, such as Jekyll or Hugo.

I spent quite a few hours mucking around trying to get Jekyll to work - and I assume that if I hadn't wanted to import my old site and have simple image galleries then it would have been find. However, it didn't work out for me, so I decided to give Hugo a shot. Within a few hours I had got most things working, and just needed to tweak the image gallery thing a bit. Carefully following the instructions at http://www.thehome.dk/article/photoswipe-gallery-hugo/ (and remembering to put my wp-upload hierarchy under $TOP/static) got me a much nicer post about our new pool. While over time I will go back through old posts and prettify them, I've only done a few for the moment.

It's going to take me a while to get used to Markdown, and I'm sure I'll wind up with a bit of javascript too. The major change, however, is that because Hugo is a static site generator, comments don't fit into the scheme unless you use a service like Disqus. I'm not all that interested in doing that, so if you like what I've written somewhere (or wish to let me know about a broken link), please email me instead.


The end of an era

Today marks the end of an era for us - as of this morning we've churned our landline from Internode across to Skymesh, so our connections to the world are all digital. I've unplugged the RJ-11 connectors for the POTS, removed the line filter, and have a shiny-ish ATA on the desk underneath the phone base station.

When I was going through the signup process for our rather nice HFC connection, Internode was unable to confirm that we could keep our landline number when going VoIP. I was sad about it, but not too sad - we would have gotten a new, unlisted number instead. The brief flirtation with MyRepublic also saw the prospect of a new number and I was fully expecting Skymesh to say the same thing. However, when I received the notification from their systems on Monday, I was delighted to see that we've kept our number. {That's made a few family members happy as well!}.


Weeeee – nbnco HFC and a new ISP!

A few weeks ago we received a nice little letter from nbnco, advising that we would soon be able to get an HFC connection installed.

I was disappointed to discover that Internode was not going to offer either static IPv4 or an IPv6 service, let alone their Professional pack with NBN connections, and cast around for another ISP. Word of mouth got me to Skymesh and guineapig status (since they haven't formally started accepting HFC connections).

Since we're quite happy with the functionality of the Mikrotik CRS109-8G-1S-2HnD-IN, I declined purchasing a new modem; the nbnco installer provided the Blessed Arris cablemodem and all I needed then was for the connection to be activated.

Once it was, I very quickly reconfigured the mtik to do what I needed. Since Skymesh is using IPoE, I disabled the pppoe client activity. I also needed to change my firewall rules a little, to reflect that actions should be occurring on a different physical port (which I had to remember to take out of the bridge). Finally, a bunch of mucking around with IPv6 address assignment got me to the point where traceroute6.net was able to ping my server's designated public address. Yay!

While Skymesh doesn't offer PTR records, I'm still able to get A, AAAA, CNAME and MX records setup, courtesy of the free service at https://www.dynu.com.

Now that we're back up and running with a shiny new connection, I'm really pleased to see that http://beta.speedtest.net/result/5894030060 is pretty much what we get for both uploads and downloads on wired connections. Last week I celebrated that by having an hour-long video chat with a colleague down in Melbourne. With the 720p camera in my mbp, over the wireless connection. No dropouts, no blockiness :-)

I need to set up Smokeping, and see about a few other analytics things I can get going, but in general it's been a seamless transition.


Success! Mikrotik and IPv6 config

I recently took delivery of a Mikrotik Cloud Router Switch (CRS109-8G-1S-2HnD-IN), purchased via their Australian distributor Duxtel ; which happens to be a sponsor of SAGE-Au.

I'd been thinking for while about putting my modem into pure bridge mode and using something smarter to do routing and firewall duties, and with the addition of some new networking kit to our home environment, now was the time to make it happen.

Our existing AP is another Mikrotik unit, the 5-port RB951G-2HnD (also purchased via Duxtel), and we've been really happy with its performance sitting in the loungeroom under the tv. Ok, when I say "we" I mean "me" because it's been absolutely rock solid and very high performance. That makes for a happy userbase.

Back to the new kit. The first thing I did was to set up the pppoe client (easy) running on port ether1. Then I proceeded to port mapping, so that my public services (like the one you're reading this on) were appropriately mapped to my dmz host. Certain useful firewall rules were added, and then I tried to get IPv6 setup, and managed to muck things up. Boo.

I'm not exactly sure what I got wrong, but it took me until just a few days ago to get it right. In that time I've read quite a few blog and forum posts, all of which helped me get to the right place. I don't recall specifically whether any one was more useful than another, so I'll just offer a general thankyou to everybody who posted in any form about their problems and solutions.

Here's my solution.

Firstly, I've got a bridge, comprised of all the ports except ether1; and named allports-1. Secondly, I run the IPv6 dhcp client on the virtual interface for the pppoe connection. This is not asking for an address, only a prefix delegation. Until I turned off asking for an address as well, I couldn't get the client to bind. That feeds into my local pool, which is providing a prefix hint of ::/64, and a prefix length of 64. (I get a /56 from Internode, which I think is more than I'm ever going to need, even if I IoT all the things under this roof).

Thirdly, while I could run an IPv6 server on one of my Solaris systems, I choose not to, using the Mikrotik's server instead. This is running on ether2-master, and serving out from the local pool.

Fourth, addresses. It was this bit which caused me all the grief. In the config which now works, I have assigned an address to my bridge allports-1 and an address to my gateway port ether1. The address I assigned to ether1 is in fact that of my /56 from Internode.

Finally, firewalling. I'm using the standard set of rules here; accept icmpv6 and https, drop telnet.

Other notes

I've found the serial console to be indispensable, especially since I managed to muck up the IPv4 routing a few times. The ability to send sniffed packets to a different system for capture using wireshark is incredibly useful. Just remember that your wireshark session needs to listen on udp port 37008.

Here's the config export; I hope it's useful to you:

/interface bridge
add name=allports-1 protocol-mode=none

/interface ethernet
set [ find default-name=ether2 ] name=ether2-master
set [ find default-name=sfp1 ] disabled=yes master-port=ether2-master

/interface wireless
set [ find default-name=wlan1 ] disabled=yes

/interface pppoe-client
add add-default-route=yes default-route-distance=1 disabled=no interface=ether1 keepalive-timeout=disabled name=node-pppoe password=YOURPASSWORD service-name=node \
    use-peer-dns=yes user=YOURUSERNAME

/ip neighbor discovery
set ether1 discover=no

/interface ethernet switch
set use-cvid-in-one2one-vlan-lookup=no

/ipv6 dhcp-server
add address-pool=localpool interface=allports-1 name=localserver

/interface bridge port
add bridge=allports-1 interface=ether2-master
add comment=defconf interface=wlan1
add bridge=allports-1 interface=ether3
add bridge=allports-1 interface=ether5
add bridge=allports-1 interface=ether6
add bridge=allports-1 interface=ether7
add bridge=allports-1 interface=ether8
add bridge=allports-1 interface=ether4

/interface bridge settings
set use-ip-firewall=yes use-ip-firewall-for-pppoe=yes use-ip-firewall-for-vlan=yes

/ip settings
set accept-redirects=yes accept-source-route=yes

/ipv6 settings
set accept-router-advertisements=yes


/ip dhcp-client
add comment=defconf dhcp-options=hostname,clientid interface=ether1

/ip dns
set allow-remote-requests=yes

/ip firewall filter
add action=drop chain=input dst-port=23 in-interface=all-ppp log=yes log-prefix=drop23- protocol=tcp
add action=fasttrack-connection chain=forward connection-state=established,related,new in-interface=!all-ppp
add chain=input connection-state=established,related,new
add action=drop chain=input connection-state=invalid
add action=fasttrack-connection chain=input in-interface=!all-ppp
add chain=forward connection-state=established,related,new
add chain=forward in-interface=!all-ppp

/ip firewall nat
add action=dst-nat chain=dstnat dst-port=25 protocol=tcp to-addresses=DMZHOST to-ports=25
add action=dst-nat chain=dstnat dst-port=53 in-interface=all-ppp protocol=udp to-addresses=DMZHOST to-ports=53
add action=dst-nat chain=dstnat dst-port=443 in-interface=all-ppp protocol=tcp to-addresses=DMZHOST to-ports=443
add action=dst-nat chain=dstnat dst-port=80 in-interface=all-ppp protocol=tcp to-addresses=DMZHOST to-ports=80
add action=masquerade chain=srcnat out-interface=node-pppoe

/ip route
add distance=1 dst-address=192.168.0.0/16 gateway=ether2-master pref-src=192.168.1.2
add distance=1 dst-address=192.168.10.0/24 gateway=allports-1
add distance=1 dst-address=192.168.10.0/24 gateway=ether2-master

/ipv6 address
add address=2001:44b8:2188:f001:: from-pool=localpool interface=allports-1
add address=2001:44b8:2188:f000:: from-pool=localpool interface=ether1

/ipv6 dhcp-client
add add-default-route=yes interface=node-pppoe pool-name=localpool prefix-hint=::/64 request=prefix
/ipv6 firewall filter
add action=drop chain=forward dst-port=23 in-interface=node-pppoe protocol=tcp
add chain=input port=443 protocol=udp
add chain=forward port=443 protocol=udp
add chain=input port=443 protocol=tcp
add chain=forward port=443 protocol=tcp
add action=drop chain=forward in-interface=node-pppoe
add chain=input in-interface=node-pppoe protocol=icmpv6
add chain=input dst-port=546 in-interface=node-pppoe protocol=udp
add action=drop chain=input in-interface=node-pppoe
add action=drop chain=input in-interface=ether1
add chain=forward in-interface=node-pppoe log=yes port=9876 protocol=tcp

/ipv6 nd
set [ find default=yes ] advertise-dns=yes hop-limit=64 managed-address-configuration=yes mtu=9000 other-configuration=yes ra-lifetime=10m reachable-time=10s \
    retransmit-interval=10s

/ipv6 nd prefix
add interface=ether2-master

/system clock
set time-zone-name=Australia/Brisbane

/system ntp client
set enabled=yes primary-ntp=202.81.208.160 secondary-ntp=119.148.81.6

In a while, once work has quietened down a bit, I'm going to play around with mac-address based VLANs. Because they seem cool, and a really neat thing. Who knows, they might even be useful someday!